Wednesday, January 18, 2012

Red Lobster (knock off) Cheddar Bay Biscuit Recipe


Mix Together


 4 Cup Baking mix (bisqick)
1 1/3 Cup Water
3/4 Cup Sharp Cheddar Cheese (shreaded)
Bake at 375' for 10-12 minutes

*In the meantime*

Mix Together

1/2 Cup Melted Butter
1/8 tsp. Garlic Powder
1/8 tsp. Onion Powder
1/8 tsp. Parsley (dried)
1/8 tsp. Salt
1 grind of Black Pepper
*Brush on top when they are done baking*
SERVE WARM!!!!


Tuesday, January 17, 2012

Sweet-Dessert-Table-Ideas-For-Your-Party


So many more at this sight!!!!!!
Something for everyone!
I just had to add this to my Blog...I was so impressed with the ideas that I had to share them with you!!!!!!

Monday, January 16, 2012

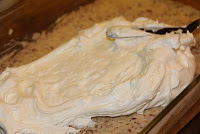
Decadent Chocolate Torte (too good to be true!)

This desert is better than anything I have ever had!
Don't ask questions!!!  LOL


Ingredients:For the Crust:
  • 1/2 cup (1 stick) of unsalted butter, softened at room temperature
  • 1 cup of all purpose flour
  • 1/4 cup of finely chopped walnuts
First layer
  • 1 (8 ounce) package of cream cheese, softened at room temperature
  • 1 cup of powdered sugar
  • 1 cup of Cool Whip (or homemade whipped cream)

Second layer
  • 2 (3.9 ounce) packages of instant chocolate pudding
  • 3 cups of whole milk
Topping:

8 oz. Cool whip
chopped walnuts
or
grated chocolate


Directions


Preheat oven to 375 degrees F. In a bowl, mix together the flour, walnuts and butter until mixture resembles cookie dough. Spread into the bottom of a 9 x 13 inch glass baking dish. Bake at 375degrees F for about 15-20 minutes or until lightly browned. Cool completely, about an hour.


Mix together the cream cheese and powdered sugar until well blended. Add 1 cup of the Cool Whip and mix together. Spread this layer over the cooled crust.


Mix together the two boxes of pudding with the 3 cups of milk until slightly thickened, about 3 minutes. Carefully spread over the cream cheese layer.


Spread the remaining cool whip topping on top. Cover and refrigerate - best if refrigerated 24 hours.
*Garnish before serving*

Due to the fact that my camera broke, I borrowed these pictures from http://www.deepsouthdish.com
Thank you so much for the use of them.  BTW check out the great recipes they have there!

Saturday, January 14, 2012

Spanish Rice


Spanish Rice


INGREDIENTS

2 POUNDS GROUND BEEF
2 CUPS OF INSTANT RICE
1 LARGE ONION (DICED)
1 LARGE GREEN PEPPER (DICED)
1QUART HOME CANNED TOMATOES (OR STORE BOUGHT)
(I CAN CAUSE I LIVE ON A FARM AND THAT'S HOW WE ROLL :) )
1 LARGE CAN OF V8 (OR TOMATO JUICE)
2 1/2 TABLESPOONS CHILI POWDER
2 1/2 TABLESPOONS GOYA ADOBO SEASONING
1 TABLESPOON SUGAR
SALT AND PEPPER TO TASTE

DIRECTIONS

SAUTE ONIONS AND GREEN PEPPERS TILL TENDER
ADD GROUND BEEF AND BROWN
ADD THE REST OF THE INGREDIENTS
SIMMER TILL ALL JUICE IS ABSORBED
(ABOUT A HALF HOUR)
THATS IT YOUR DONE TIME TO EAT!

SERVE WITH SALAD AND HOT CRUSTY BREAD!


Friday, January 13, 2012

Safe Food Handling (when in doubt, Throw it out) or check this out!

Here is the FDA recommendation on safe food handling.

Just remember when in doubt, throw it out!!!!!!

or check this out!!!!  LOL


http://www.fsis.usda.gov/Fact_Sheets/Focus_On_Freezing/index.asp#12

Fact Sheets
Safe Food Handling
Freezing and Food Safety


Foods in the freezer — are they safe? Every year, thousands of callers to the USDA Meat and Poultry Hotline aren't sure about the safety of items stored in their own home freezers. The confusion seems to be based on the fact that few people understand how freezing protects food. Here is some information on how to freeze food safely and how long to keep it.

What Can You Freeze?
You can freeze almost any food. Some exceptions are canned food or eggs in shells. However, once the food (such as a ham) is out of the can, you may freeze it.

Being able to freeze food and being pleased with the quality after defrosting are two different things. Some foods simply don't freeze well. Examples are mayonnaise, cream sauce and lettuce. Raw meat and poultry maintain their quality longer than their cooked counterparts because moisture is lost during cooking.

[Top of Page]

Is Frozen Food Safe?
Food stored constantly at 0 °F will always be safe. Only the quality suffers with lengthy freezer storage. Freezing keeps food safe by slowing the movement of molecules, causing microbes to enter a dormant stage. Freezing preserves food for extended periods because it prevents the growth of microorganisms that cause both food spoilage and foodborne illness.

[Top of Page]

Does Freezing Destroy Bacteria & Parasites?
Freezing to 0 °F inactivates any microbes — bacteria, yeasts and molds — present in food. Once thawed, however, these microbes can again become active, multiplying under the right conditions to levels that can lead to foodborne illness. Since they will then grow at about the same rate as microorganisms on fresh food, you must handle thawed items as you would any perishable food.

Trichina and other parasites can be destroyed by sub-zero freezing temperatures. However, very strict government-supervised conditions must be met. Home freezing cannot be relied upon to destroy trichina. Thorough cooking, however, will destroy all parasites.

[Top of Page]

Freshness & Quality
Freshness and quality at the time of freezing affect the condition of frozen foods. If frozen at peak quality, thawed foods emerge tasting better than foods frozen near the end of their useful life. So freeze items you won't use quickly sooner rather than later. Store all foods at 0° F or lower to retain vitamin content, color, flavor and texture.

[Top of Page]

Nutrient Retention
The freezing process itself does not destroy nutrients. In meat and poultry products, there is little change in nutrient value during freezer storage.

[Top of Page]

Enzymes
Enzyme activity can lead to the deterioration of food quality. Enzymes present in animals, vegetables, and fruit promote chemical reactions before and after harvest, such as ripening. Freezing only slows the enzyme activity that takes place in foods. It does not halt them. 

Enzyme activity does not harm frozen meats or fish and is neutralized by the acids in frozen fruits. But most vegetables that freeze well are low acid and require brief, partial cooking to prevent deterioration. This is called "blanching." For successful freezing, blanch or partially cook vegetables in boiling water or in a microwave oven. Then rapidly chill the vegetables prior to freezing and storage. Consult a cookbook for timing.

[Top of Page]

Packaging
Proper packaging helps maintain quality and prevent freezer burn. It is safe to freeze meat or poultry directly in its original packaging, however this type of wrap is permeable to air and quality may diminish over time. For prolonged storage, overwrap these packages as you would any food for long-term storage. It is not necessary to rinse meat and poultry. Freeze unopened vacuum packages as is. If you notice that a package has accidentally been torn or has opened while food is in the freezer, the food is still safe to use; merely overwrap or rewrap it. 

[Top of Page]

Freezer Burn
Freezer burn does not make food unsafe, merely dry in spots. It appears as grayish-brown leathery spots and is caused by air coming in contact with the surface of the food. Cut freezer-burned portions away either before or after cooking the food. Heavily freezer-burned foods may have to be discarded for quality reasons.

[Top of Page]

Color Changes
Color changes can occur in frozen foods. The bright red color of meat as purchased usually turns dark or pale brown depending on its variety. This may be due to lack of oxygen, freezer burn or abnormally long storage.

Freezing doesn't usually cause color changes in poultry. However, the bones and the meat near them can become dark. Bone darkening results when pigment seeps through the porous bones of young poultry into the surrounding tissues when the poultry meat is frozen and thawed.

The dulling of color in frozen vegetables and cooked foods is usually the result of excessive drying due to improper packaging or over-lengthy storage.

[Top of Page]

Freeze Rapidly
Freeze food as fast as possible to maintain its quality. Rapid freezing prevents undesirable large ice crystals from forming throughout the product because the molecules don't have time to form into the characteristic six-sided snowflake. Slow freezing creates large, disruptive ice crystals. During thawing, they damage the cells and dissolve emulsions. This causes meat to "drip" and lose juiciness. Emulsions such as mayonnaise or cream will separate and appear curdled.

Ideally, a food 2-inches thick should freeze completely in about 2 hours. If your home freezer has a "quick-freeze" shelf, use it. Never stack packages to be frozen. Instead, spread them out in one layer on various shelves, stacking them only after frozen solid.

[Top of Page]

Freezer - Refrigerator Temperatures
If a refrigerator freezing compartment can't maintain zero degrees or if the door is opened frequently, use it for short-term food storage. Eat those foods as soon as possible for best quality. Use a free-standing freezer set at 0 °F or below for long-term storage of frozen foods. Keep an appliance thermometer in your freezing compartment or freezer to check the temperature. This is important if you experience power-out or mechanical problems. The temperature in the refrigerator should be set at 40 °F or below. Check the refrigerator temperature with an appliance thermometer.

[Top of Page]

Freezer Storage Time
Because freezing keeps food safe almost indefinitely, recommended storage times are for quality only. Refer to the freezer storage chart at the end of this document, which lists optimum freezing times for best quality.

If a food is not listed on the chart, you may determine its quality after thawing. First check the odor. Some foods will develop a rancid or off odor when frozen too long and should be discarded. Some may not look picture perfect or be of high enough quality to serve alone but may be edible; use them to make soups or stews. 

[Top of Page]

Safe Thawing
Never thaw foods in a garage, basement, car, dishwasher or plastic garbage bag; out on the kitchen counter, outdoors or on the porch. These methods can leave your foods unsafe to eat.

There are three safe ways to thaw food: in the refrigerator, in cold water, or in the microwave. It's best to plan ahead for slow, safe thawing in the refrigerator. Small items may defrost overnight; most foods require a day or two. And large items like turkeys may take longer, approximately one day for each 5 pounds of weight.

For faster thawing, place food in a leak proof plastic bag and immerse it in cold water. (If the bag leaks, bacteria from the air or surrounding environment could be introduced into the food. Tissues can also absorb water like a sponge, resulting in a watery product.) Check the water frequently to be sure it stays cold. Change the water every 30 minutes. After thawing, cook immediately.

When microwave-defrosting food, plan to cook it immediately after thawing because some areas of the food may become warm and begin to cook during microwaving.

[Top of Page]

Refreezing
Once food is thawed in the refrigerator, it is safe to refreeze it without cooking, although there may be a loss of quality due to the moisture lost through thawing. After cooking raw foods which were previously frozen, it is safe to freeze the cooked foods. If previously cooked foods are thawed in the refrigerator, you may refreeze the unused portion. Freeze leftovers within 3-4 days. Do not refreeze any foods left outside the refrigerator longer than 2 hours; 1 hour in temperatures above 90 °F.

If you purchase previously frozen meat, poultry or fish at a retail store, you can refreeze if it has been handled properly.

[Top of Page]

Cooking Frozen Foods
Raw or cooked meat, poultry or casseroles can be cooked or reheated from the frozen state. However, it will take approximately one and a half times as long to cook. Remember to discard any wrapping or absorbent paper from meat or poultry.

When cooking whole frozen poultry, remove the giblet pack from the cavity as soon as you can loosen it. Cook the giblets separately. Read the label on USDA-inspected frozen meat and poultry products. Some, such as pre-stuffed whole birds,MUST be cooked from the frozen state to ensure a safely cooked product.

LOOK FOR THE USDA OR STATE MARK OF INSPECTION

Poultry Seal


Thursday, January 12, 2012

Chicken Saltimbocca

                                            Chicken Saltimbocca


INGREDIENTS
8 Chicken breast cutlets
8 thin slices fresh mozzarella
8 slices prosciutto
16 large Sage leaves
2 Tablespoons olive oil
3 Tablespoons butter
1 Tablespoon flour
1/2 cup dry white wine
1/2 cup chicken stock
Salt

PREPARATION:
1. Salt the pieces of chicken on each side. Lightly pound each piece between plastic wrap. Lay a piece of mozzarella, then 2 sage leaves. Lay a prosciutto slice on each piece of chicken. Weave a wooden scewer in and out to secure.
2. Heat a large skillet med-high. Add the oil and two tablespoons of butter. When hot and foaming, add the chicken, prosciutto side down in two batches of four. Saute the chicken on high, about 1-2 minutes each side to brown. Remove to a platter and repeat with next batch.
3. Add the flour to the pan and cook until tan in color. Add the wine and stock to the pan, cooking on high to scrape up brown bits and reduce by half. Remove from heat and whisk in remaining tablespoon of butter. Remove scewers from chicken, pour hot sauce over all.

Tuesday, January 10, 2012

***Dips***Dips***and more ***Dips***

Just in time for Football
or anytime I might add....

These are some of my favorites...


Hot Crab Dip

1-md Onion (sliced thin)
6-Tbl. Butter
(saute till translucent)
add
1-8oz. block Cream Cheese
1/4 C. Red Hot
1/4 C. Milk
(heat through till all melted and combined)
stir in
2- cans of crab (drained)
1- pachage or fresh crab chunks
(warm till heated through)
*serve with hot tortilla chips*


Chicken Wing Dip
1- 8 oz. block of Cream Cheese
2- C. Shreaded Cheddar Cheese
2- lg. cans of Chicken Breast or fresh (cooked) (it's up to you)
1- C. Red Hot
1- C. Ranch dressing

Combine everything but *chicken*
in a dip crock pot (or on stove)
till bubbley
add Chicken and heat through
*serve with hot tortilla chips*


Rye Bread Dip

1/2 C. Sour Cream
1/2 C. Mayo
1 Tbl. dill
1 tsp. onion powder
1 Tbl. chives or green onion
1 jar of Chipped beef (sliced up)
 *combine and chill for 2 hours*
*serve with chunked up Crusty Rye Bread*

Vegatable Lasagna


Ingredients

  • 12 lasagna noodles
  • 2 tablespoons olive oil
  • 2 heads fresh broccoli, chopped
  • 2 carrots, thinly sliced
  • 1 large onion, chopped
  • 2 bell peppers, 1 green and 1 red chopped
  • 3 cloves garlic, minced
  • 1/2 cup all-purpose flour
  • 3 cups milk
  • 3/4 cup Parmesan cheese, divided
  • 1/2 teaspoon salt
  • 1/2 teaspoon pepper
  • 1 (10 ounce) package frozen chopped spinach, thawed
  • 1 (8 ounce) container small curd cottage cheese
  • 24 ounces ricotta cheese
  • 2 1/2 cups shredded mozzarella cheese, divided

Directions

  1. Preheat oven to 375 degrees F (190 degrees C). Grease a 9 x 13 inch casserole dish.
  2. Bring a large pot of lightly salted water to a boil. Add lasagna noodles and cook for 8 to 10 minutes or until al dente; drain.
  3. Heat oil in a large cast iron skillet over medium heat. When oil is hot add broccoli, carrots, onions, bell peppers, zucchini and garlic. Saute for 7 minutes; set aside.
  4. Place flour in a medium saucepan and gradually whisk in milk until well blended. Bring to a boil over medium heat. Cook 5 minutes, or until thick, stirring constantly. Stir in 1/2 cup Parmesan cheese, salt and pepper; cook for 1 minute, stirring constantly. Remove from heat; stir in spinach. Reserve 1/2 cup spinach mixture. In a small bowl combine cottage and ricotta cheeses; stir well.
  5. Spread about 1/2 cup of spinach mixture in the bottom of the prepared pan. Layer noodles, ricotta mixture, vegetables, spinach mixture and 2 cups mozzarella cheese, ending with noodles. Top with reserved spinach mixture, 1/2 cup mozzarella cheese and 1/4 cup parmesan cheese.
  6. Bake in preheated oven for 35 minutes, or until lightly browned on top. Cool for approximately 10 minutes before serving.

Saturday, January 7, 2012

Fried Pickles

These yummy little nuggets are great for Football game night or any other time! 
They are just Awesome!!!!


2 cups buttermilk
2 cups flour (divided use)
1 teaspoon garlic pepper seasoning  (I used Johnny’s Seasoning Salt and no additional salt)
1 teaspoon kosher salt

1 TEASPOON ONION POWDER
1 TEASPOON GARLIC POWDER
1 (12 oz.) bottle Shiner Bohemian Black Lager (or other Stout beer)
Panko Bread Crumbs/didn’t measure just enough to coat the pickles
1 (16 oz.) jar In a Pickle pickles or other crinkle cut pickle

DIPPING SAUCE
1/4 cup Mayonnaise
1/4 cup sour cream
1 to 2 Tablespoons of cayenne pepper

1tsp onion powder
1 tsp dill
ANOTHER DIPPING SAUCE YOU MIGHT LIKE

1 cup japanese mayonnaise , OR Kewpie brand (regular mayo will do the trick)
2 1/2 tablespoons sirachi hot chili sauce
6 green onions , whites only, coarsely chopped
4 garlic cloves , coarsely chopped
1/2 teaspoon prepared horseradish

MIX WELL AND CHILL


First, make your dipping sauce. AND CHILL!!!
You will need 3 prep bowls (or a bowl and two plates). For the seasoned flour, put 1 cup of flour in a bowl and season it with the seasoning salt (or seasoned pepper and salt), onion and garlic powder. For the batter, whisk together one cup of flour with the beer and buttermilk. Pour panko crumbs into the third dish.


Remove the pickles from the jar and pat them dry with a paper towel. Place each slice individually in the flour…tapping off the excess. Then dunk it in the batter, letting the excess drip off. Then dredge it in the panko crumbs. Set the battered pickle on a cookie sheet covered with a sheet of wax paper. Do this for all of your pickles.
Bear in mind, that while a tiny pickle slice doesn’t look like much, once it is battered and fried it becomes a substantial bite, so you really don’t need more than five or six per person if you are doing this as an appetizer.
In a cast iron skillet, carefully heat about one inch of vegetable oil to 350 degrees. Or in deep fryer at 375 degrees.  Carefully (using tongs) place each slice into the hot oil. Working in small batches, fry each pickle until golden brown, turning them halfway through the process. Remove them to a rack or to paper to drain a bit. I believe that a cut up paper grocery bag is the #1 best material for this job.

Thursday, January 5, 2012

CHINESE DUMPLINGS WITH GINGER SAUCE (Hot trend for 2012)


Ingredients

  • 100 (3.5 inch square) wonton wrappers
  • 1 3/4 pounds ground pork
  • 1 tablespoon minced fresh ginger root
  • 4 cloves garlic, minced
  • 2 tablespoons thinly sliced green onion
  • 4 tablespoons soy sauce
  • 3 tablespoons sesame oil
  • 1 egg, beaten
  • 5 cups finely shredded Chinese cabbage

Directions

  1. In a large bowl, combine the pork, ginger, garlic, green onion, soy sauce, sesame oil, egg and cabbage. Stir until well mixed.
  2. Place 1 heaping teaspoon of pork filling onto each wonton skin. Moisten edges with water and fold edges over to form a triangle shape. Roll edges slightly to seal in filling. Set dumplings aside on a lightly floured surface until ready to cook.
  3. To Cook: Steam dumplings in a covered bamboo or metal steamer for about 15 to 20 minutes. Serve immediately with * ginger sauce.
*  To freeze, lay parchment paper onto cookie sheet then place Dumplings on cookie sheet.  Freeze seperate and then place into freezer container or cryovac.

*Ginger sauce
  • 1/4 cup chopped onion
  • 1 clove garlic, minced
  • 1 tablespoon minced fresh ginger root
  • 1/2 lemon, juiced
  • 1/4 cup soy sauce
  • 1/4 teaspoon sugar
  • 1/4 teaspoon white vinegar

  • *garnish with Fresh green onion*


Tuesday, January 3, 2012

Thai Noodles With Spicy Peanut Sauce

Thanks Food.com

for all your recipe ideas


Sauce

Directions:

  1. 1
    Cook pasta in a large pot of salted water according to package directions.
  2. 2
    Drain and return to pot.
  3. 3
    Add 2 TBSP sesame oil and toss to coat.
  4. 4
    Set aside.
  5. 5
    Heat remaining 2 TBSP sesame oil in heavy pot over medium-high heat.
  6. 6
    Add green onions, carrots, stir-fry veggies, garlic and ginger.
  7. 7
    Saute until vegetables soften, about 4 minutes.
  8. 8
    Add honey, peanut butter, soy sauce, vinegar and chili-garlic sauce and mix well.
  9. 9
    Simmer sauce 2 minutes.
  10. 10
    Pour sauce over pasta and toss well.
  11. 11
    Transfer to platter and serve warm.
  12. 12
    Garnish with additional green onions, if desired.